Getting Started
Quickstart
Solana Playground
Solana Playground (Solpg) is a browser based IDE that allows you to quickly develop, deploy, and test Solana programs!
To get started, go to https://beta.solpg.io/.
Create Playground Wallet
If it is your first time using Solana Playground, you'll first need to create a Playground Wallet.
Click on the red status indicator button labeled "Not connected" at the bottom left of the screen, (optionally) save your wallet's keypair file to your computer for backup, then click "Continue".
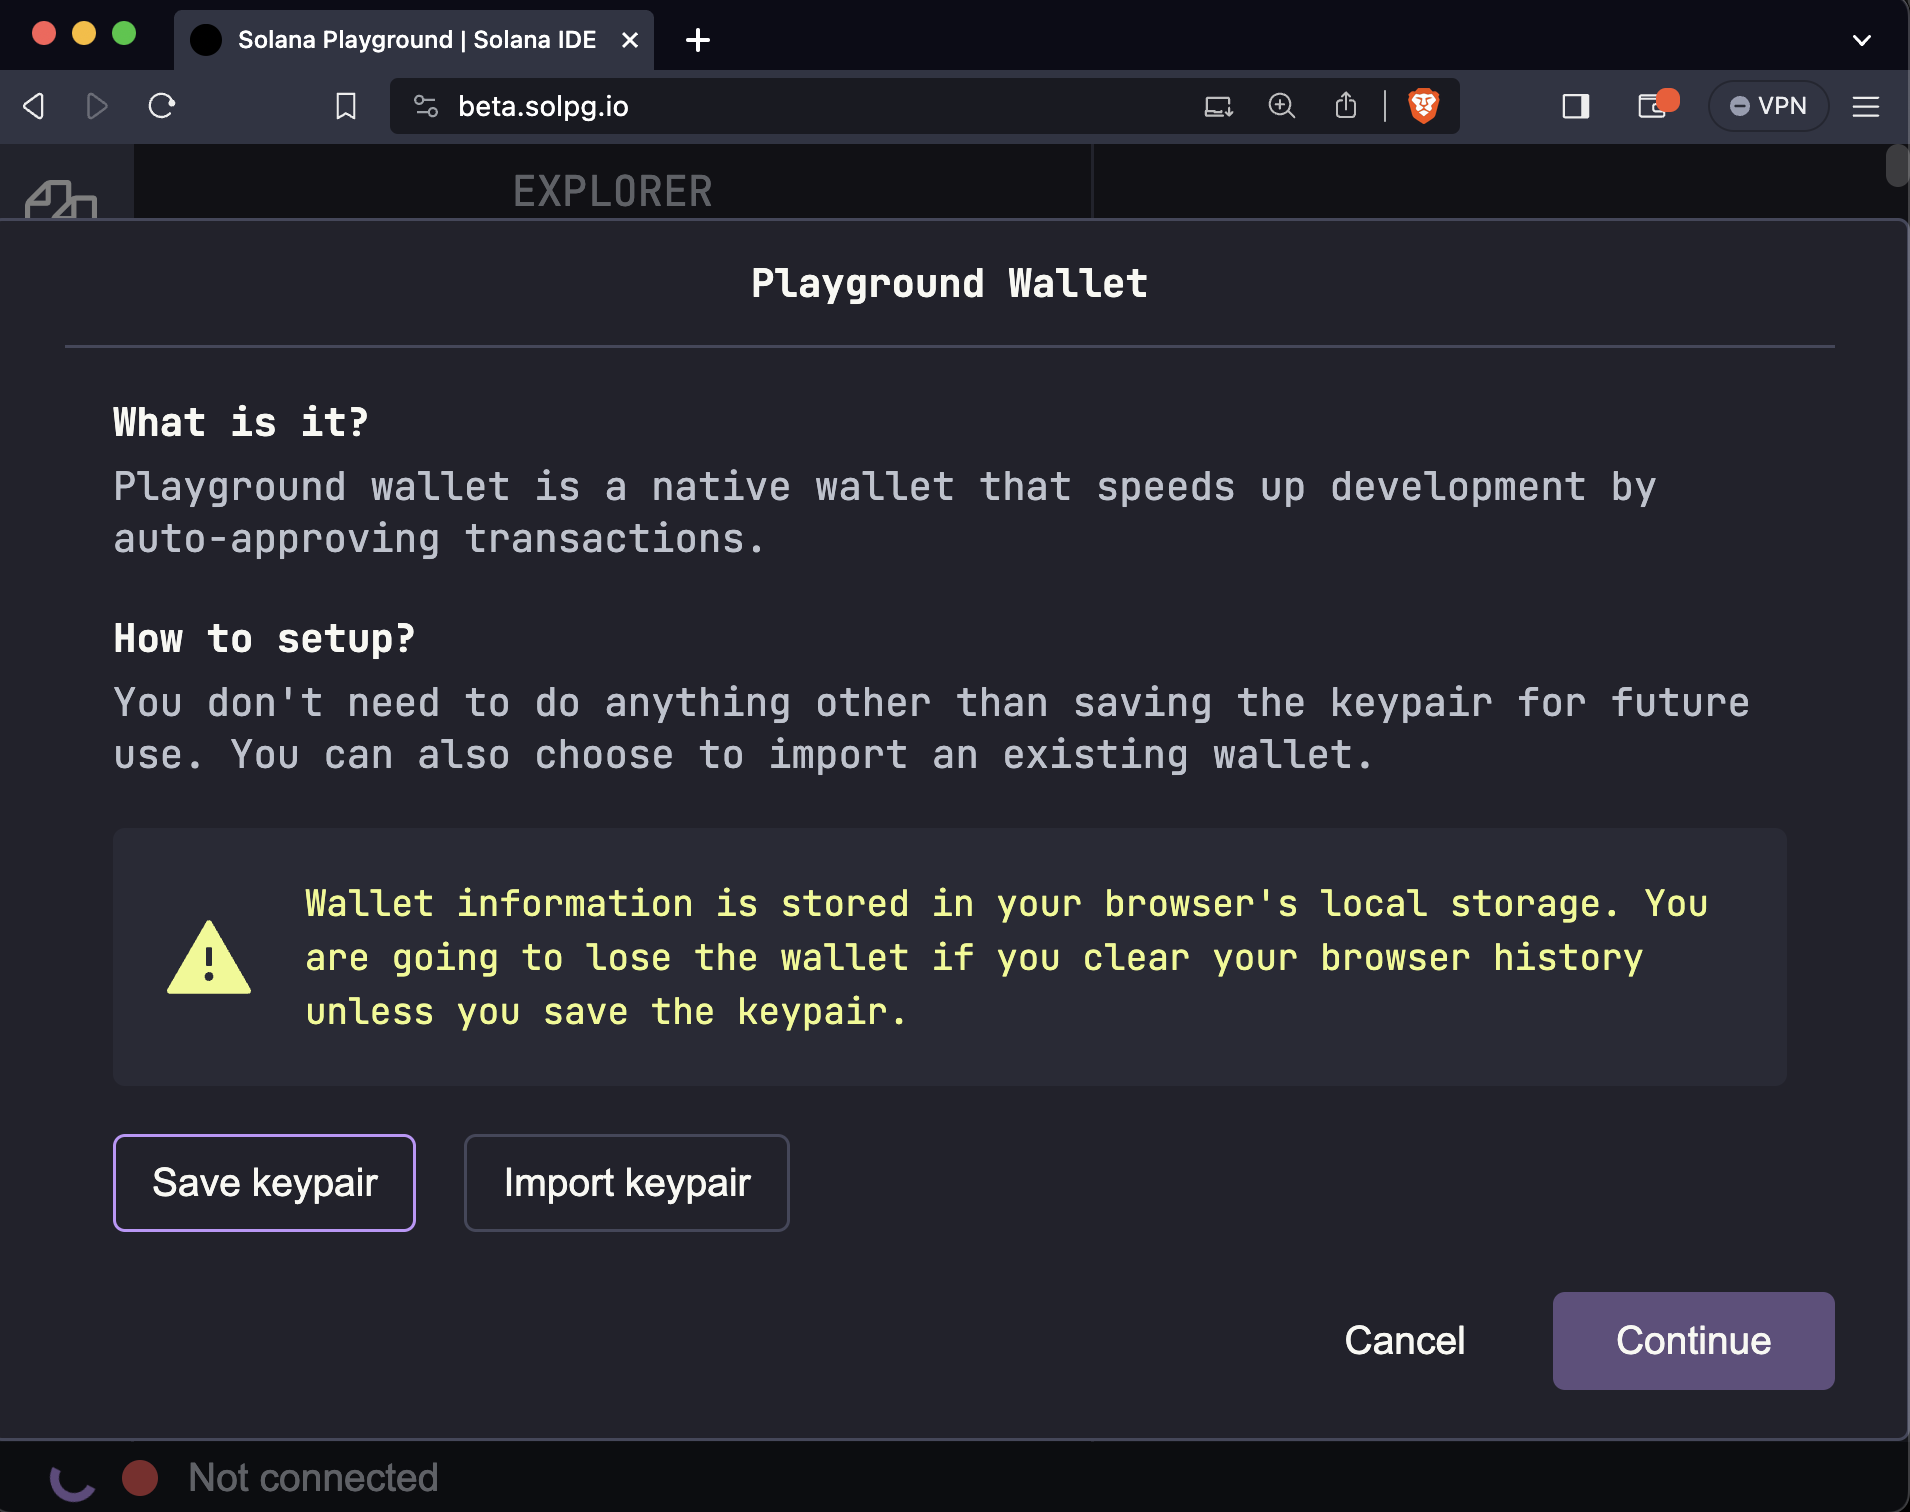
After your Playground Wallet is created, you will notice the bottom of the window now states your wallet's address, your SOL balance, and the Solana cluster you are connected to (devnet by default).
Your Playground Wallet will be saved in your browser's local storage. Clearing your browser cache will remove your saved wallet.
To fund your Playground wallet with devnet SOL, run the following command in the Playground terminal:
solana airdrop 5
Alternatively, you can use this devnet faucet.
Create Anchor Project
Next, click the "Create a new project" button on the left-side panel.
Enter a project name, select Anchor as the framework, then click the "Create" button.
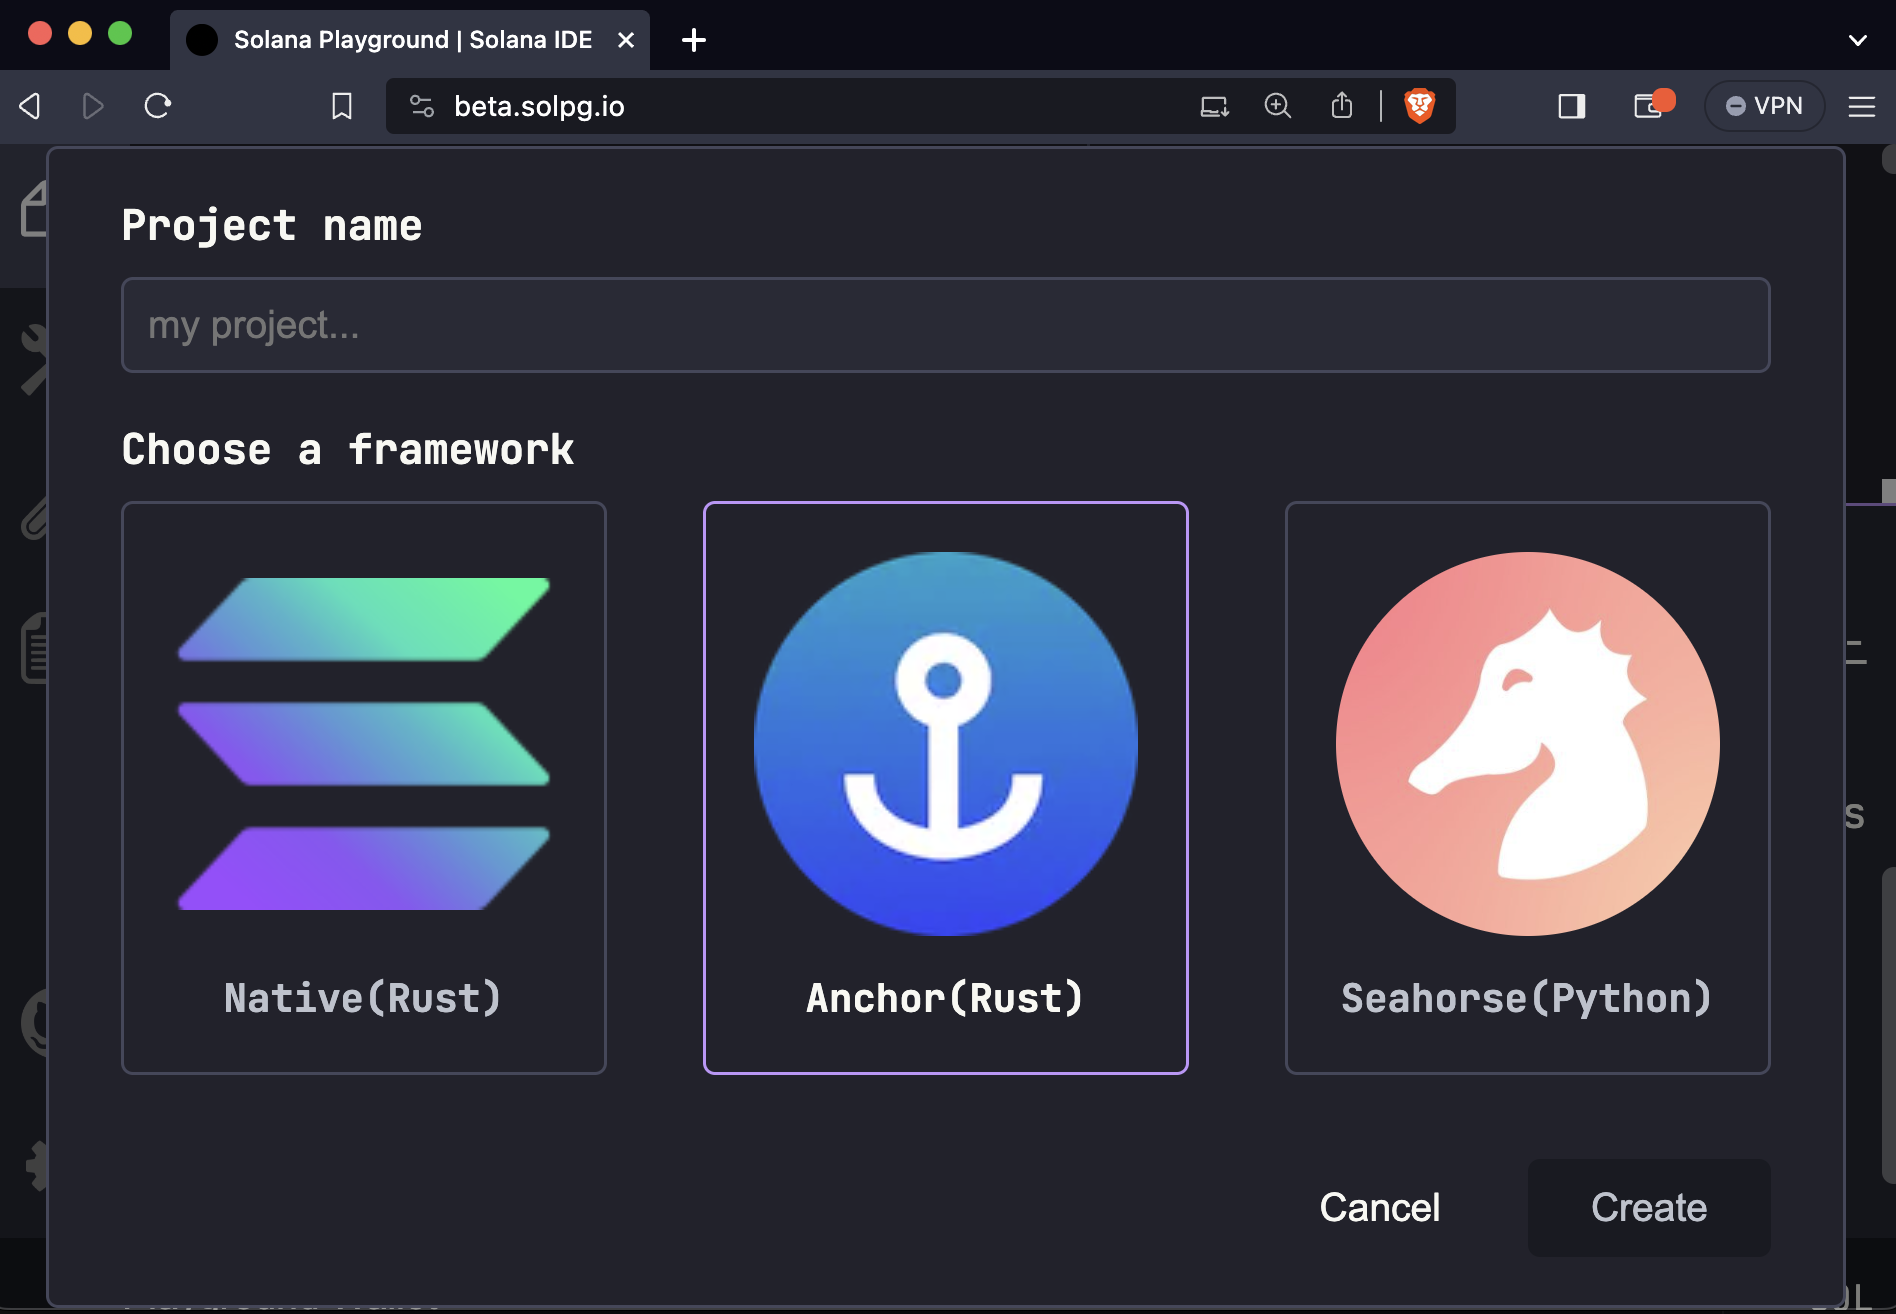
This will create a basic Anchor program that can be found in the src/lib.rs file. You can learn more about the details of an Anchor program in the Core concepts section of the docs.
use anchor_lang::prelude::*;


// This is your program's public key and it will update
// automatically when you build the project.
declare_id!("11111111111111111111111111111111");


#[program]
mod hello_anchor {
    use super::*;
    pub fn initialize(ctx: Context<Initialize>, data: u64) -> Result<()> {
        ctx.accounts.new_account.data = data;
        msg!("Changed data to: {}!", data); // Message will show up in the tx logs
        Ok(())
    }
}


#[derive(Accounts)]
pub struct Initialize<'info> {
    // We must specify the space in order to initialize an account.
    // First 8 bytes are default account discriminator,
    // next 8 bytes come from NewAccount.data being type u64.
    // (u64 = 64 bits unsigned integer = 8 bytes)
    #[account(init, payer = signer, space = 8 + 8)]
    pub new_account: Account<'info, NewAccount>,
    #[account(mut)]
    pub signer: Signer<'info>,
    pub system_program: Program<'info, System>,
}


#[account]
pub struct NewAccount {
    data: u64
}
Build and Deploy Program
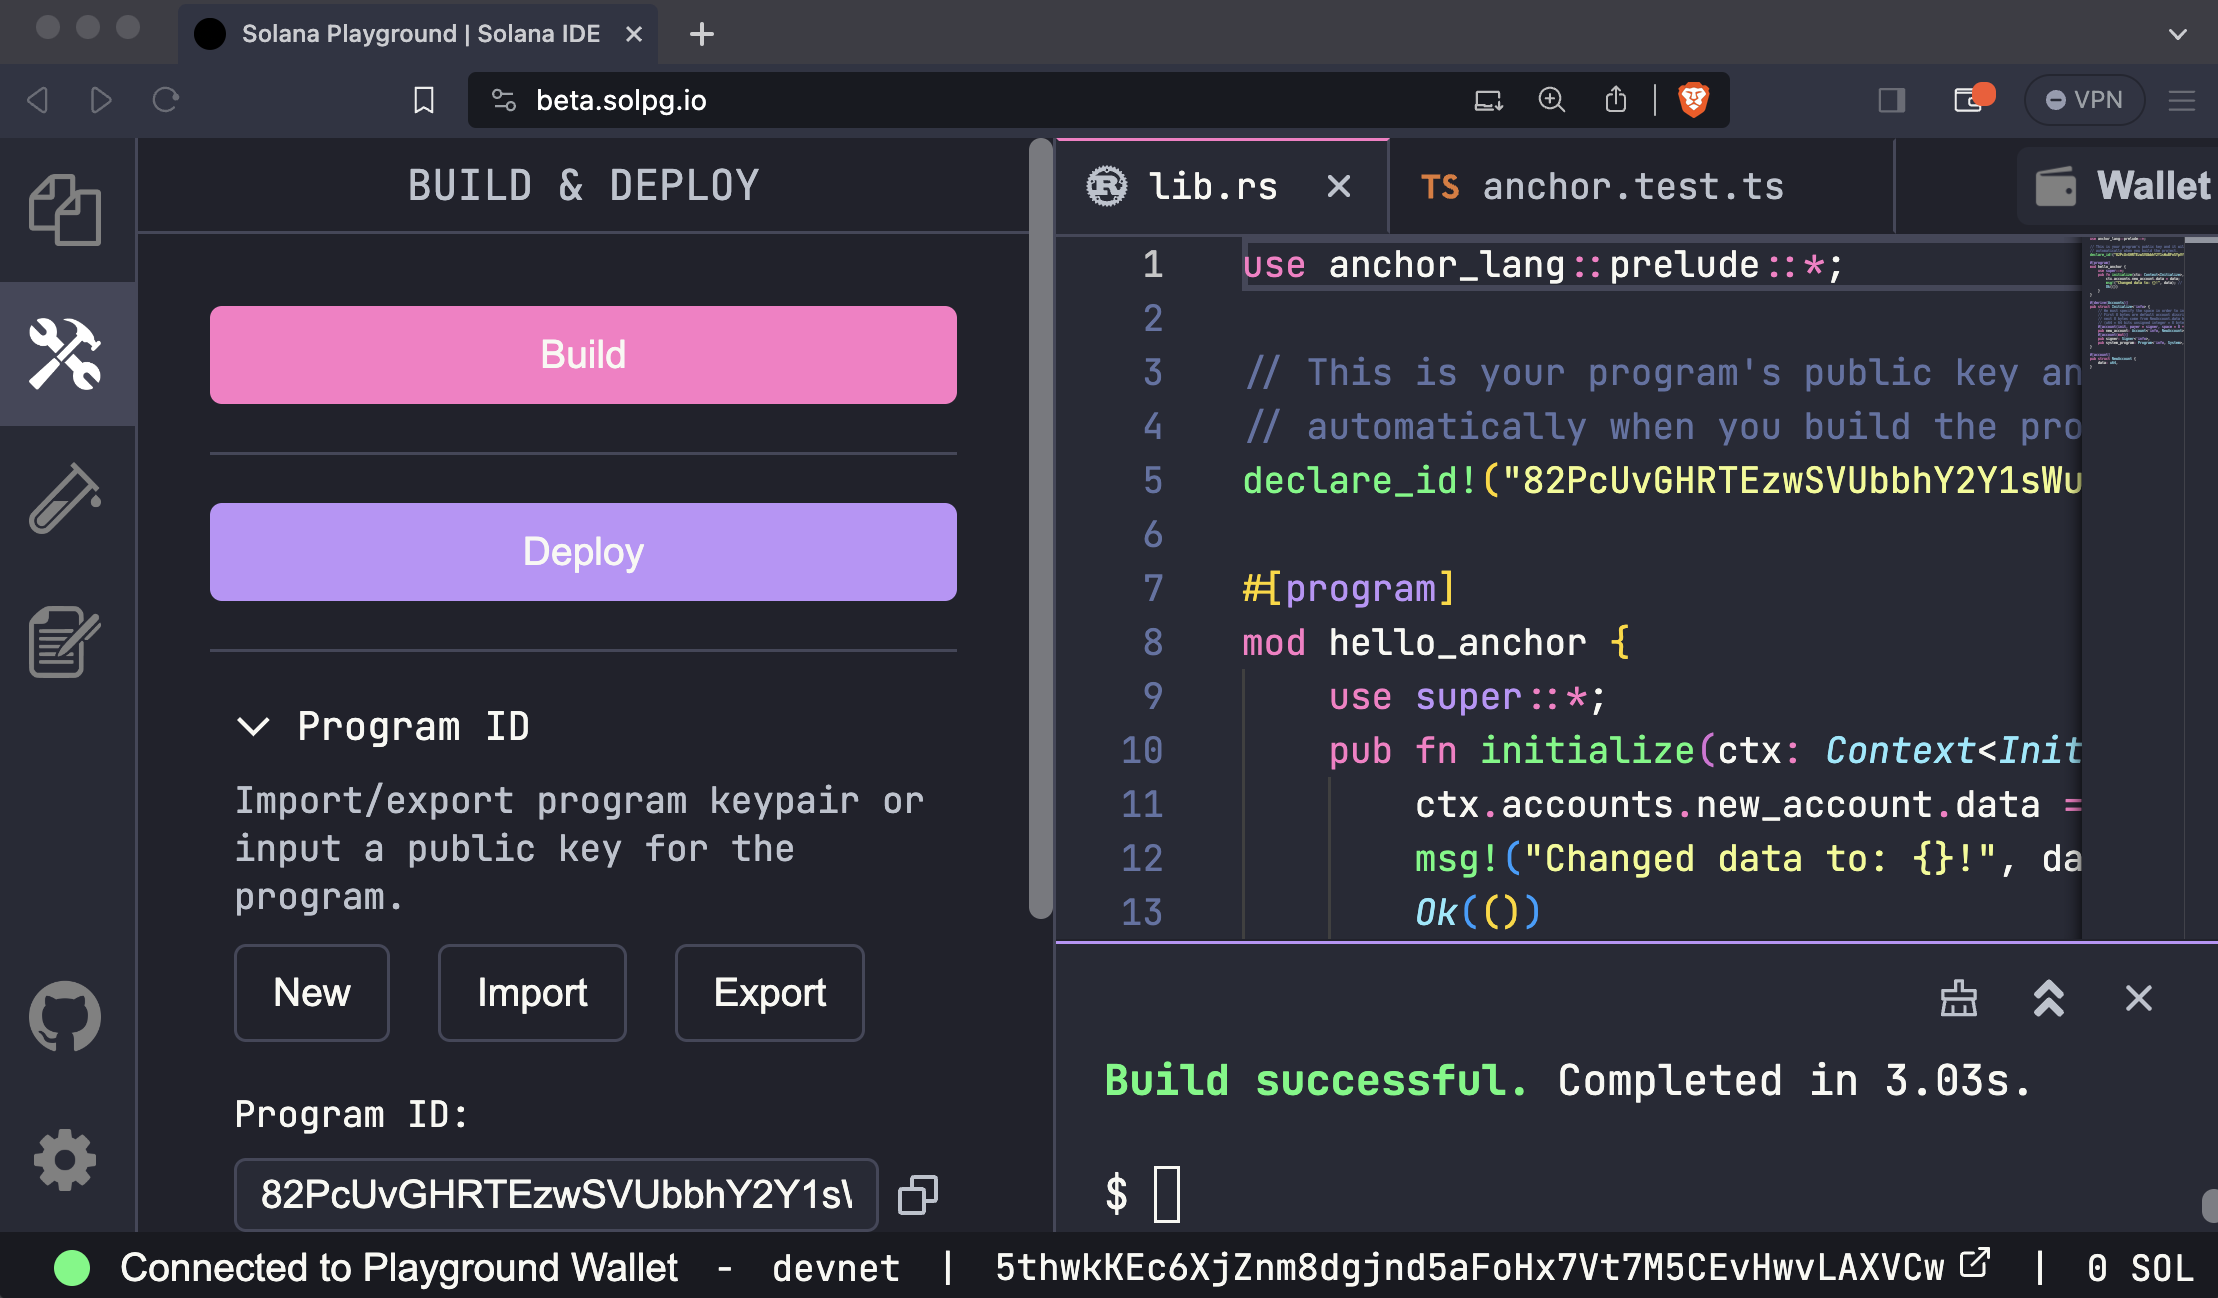
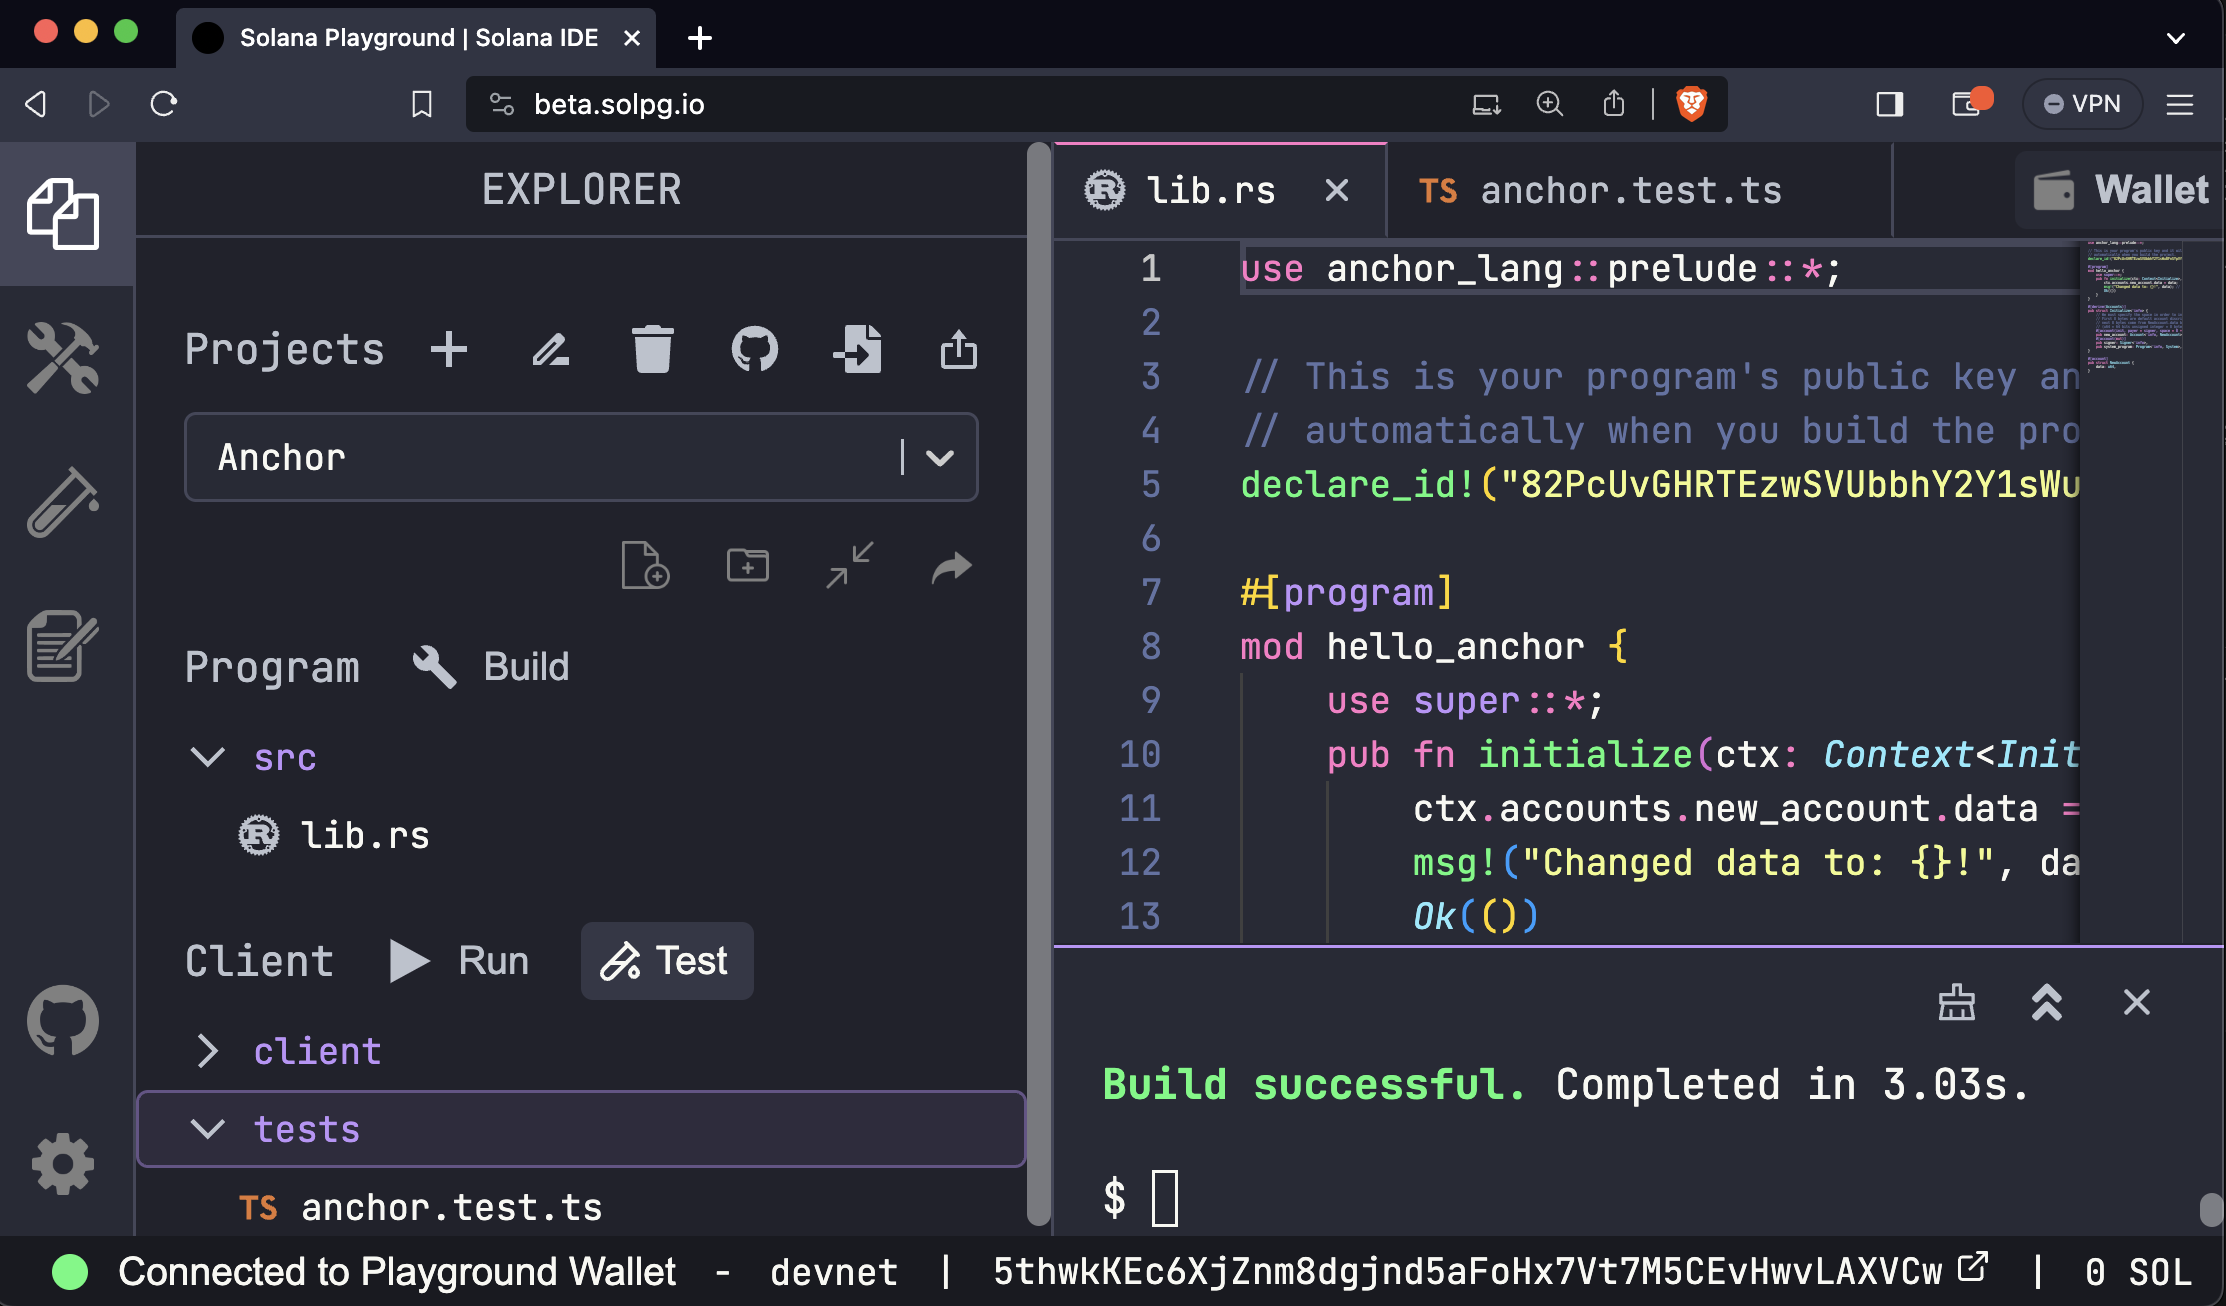
To build the program, simply run build in the terminal. Building the program will update the program address in declare_id!(). This is the on-chain address of your program.
Once the program is built, run deploy in the terminal to deploy the program to the cluster (devnet by default). To deploy a program, SOL must be allocated to the on-chain account that stores the program. If you do not have enough SOL, you may need to first request an airdrop.
You can also use the Build and Deploy buttons on the left-side panel.
Test Program
Included with the starter code is a test file found in tests/anchor.test.ts. This file demonstrates how to interact with the program from the client.
// No imports needed: web3, anchor, pg and more are globally available


describe('Test', () => {
  it('initialize', async () => {
    // Generate keypair for the new account
    const newAccountKp = new web3.Keypair()


    // Send transaction
    const data = new BN(42)
    const txHash = await pg.program.methods
      .initialize(data)
      .accounts({
        newAccount: newAccountKp.publicKey,
        signer: pg.wallet.publicKey,
        systemProgram: web3.SystemProgram.programId,
      })
      .signers([newAccountKp])
      .rpc()
    console.log(`Use 'solana confirm -v ${txHash}' to see the logs`)


    // Confirm transaction
    await pg.connection.confirmTransaction(txHash)


    // Fetch the created account
    const newAccount = await pg.program.account.newAccount.fetch(
      newAccountKp.publicKey
    )


    console.log('On-chain data is:', newAccount.data.toString())


    // Check whether the data on-chain is equal to local 'data'
    assert(data.eq(newAccount.data))
  })
})
To run the test file once the program is deployed, run test in the terminal.
You can also use the Test button on the left-side panel.
Lastly, the SOL allocated to the on-chain program can be fully recovered by closing the program.
You can close a program by running the following command and specifying the program ID found in declare_id!():
solana program close <ProgramID>
Congratulations! You've just built and deployed your first Solana program using the Anchor framework!
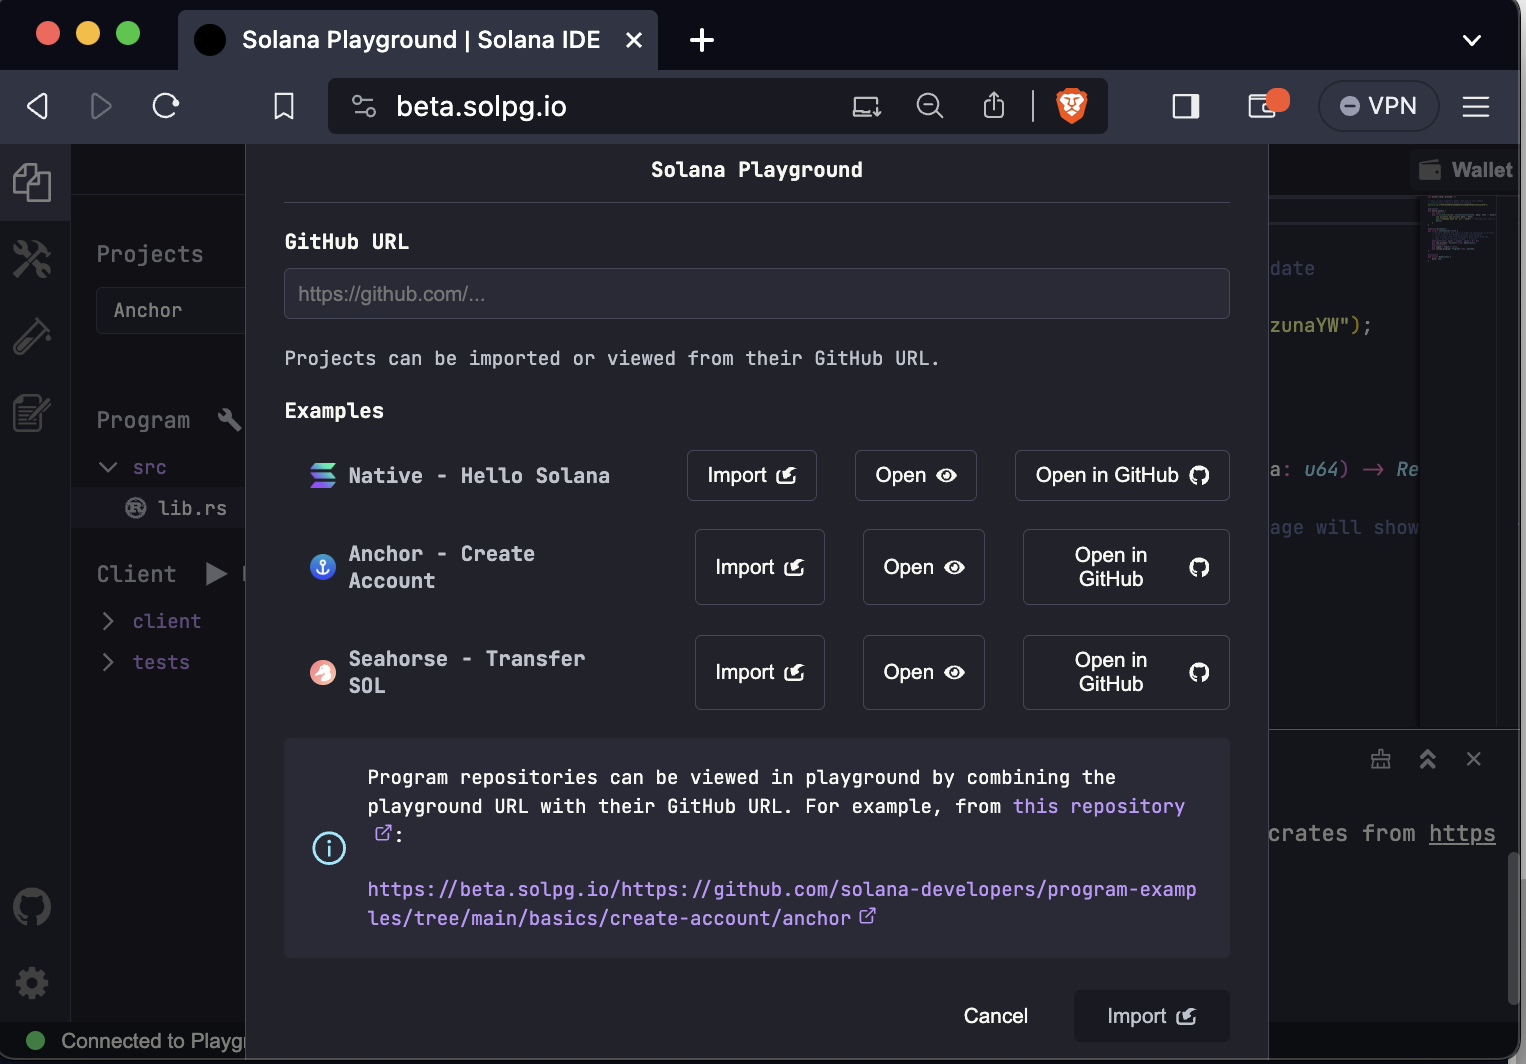
Import from Github
Solana Playground offers a convenient feature allowing you to import or view projects using their GitHub URLs.
Open this Solpg link to view the Anchor project from this Github repo.
Click the Import button and enter a name for the project to add it to your list of projects in Solana Playground.
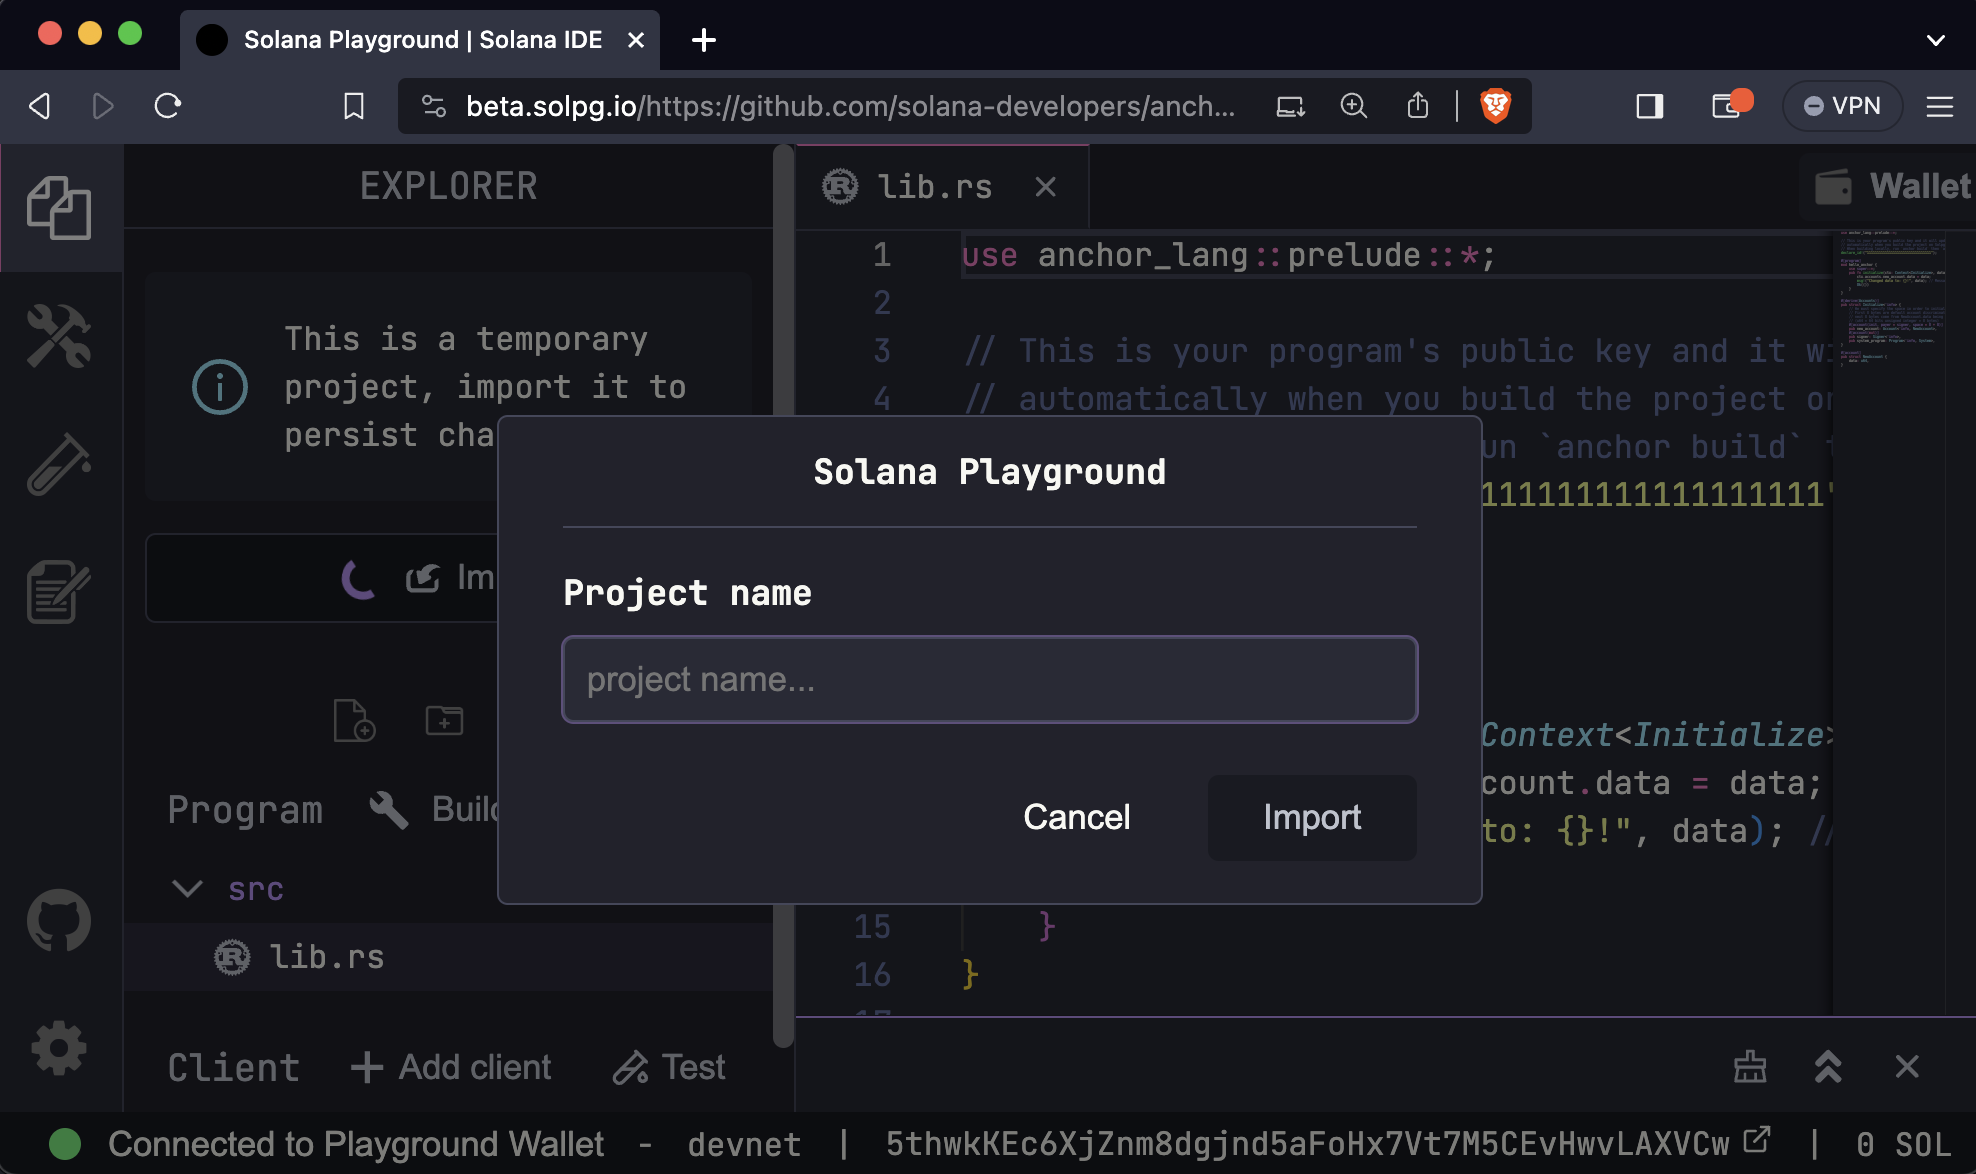
Once a project is imported, all changes are automatically saved and persisted within the Playground environment.
Additionally, you have the option to import projects directly by clicking the Github icon on the left-side panel.
